
Contents of this article
In this article, I describe the process for adding a Router in Packet Tracer. Cisco Packet Tracer, a versatile network simulation tool, allows network professionals, students, and enthusiasts to design, configure, and test network topologies in a virtual environment. One of the fundamental building blocks of any network is a router, which serves as a gateway for data traffic between different network segments. In this comprehensive guide, we will explore the step-by-step process of adding a router to your network topology in Cisco Packet Tracer. let’s see the process of adding a Router in Packet Tracer.
Why Add a Router?
Before we dive into the technical aspects, let’s understand the importance of routers in network design:
- Segmentation: Routers enable network segmentation, allowing you to divide your network into smaller, manageable subnets. This enhances network security and performance.
- Interconnectivity: Routers connect different network segments, enabling data traffic to flow between them. They make it possible for devices in one subnet to communicate with devices in another.
- Routing: Routers make decisions about the best path for data to travel from source to destination based on routing protocols and network configurations.
- Network Services: Routers can provide network services like Network Address Translation (NAT), DHCP (Dynamic Host Configuration Protocol), and access control.
Now, let’s proceed with adding a Router in Packet Tracer network:
Step 1: Launch the Cisco Packet Tracer
Begin by launching Cisco Packet Tracer on your computer. Ensure you have a Packet Tracer project open or create a new one if you’re starting from scratch.
Step 2: Access the Network Devices
To add a router to your network, you’ll need to access the Network Devices palette in Packet Tracer:
- On the left side of the Packet Tracer window, you’ll find the “Devices” tab. Click on it to expand the Devices palette.
- Within the Devices palette, locate the “Router” category. This category contains various router models that you can add to your network.
Step 3: Select a Router Model
Cisco Packet Tracer provides a range of router models to choose from, each with different capabilities and features. Select a router model that best suits your network design requirements. You can simply click and drag the chosen router model onto your workspace to add it to your network topology.
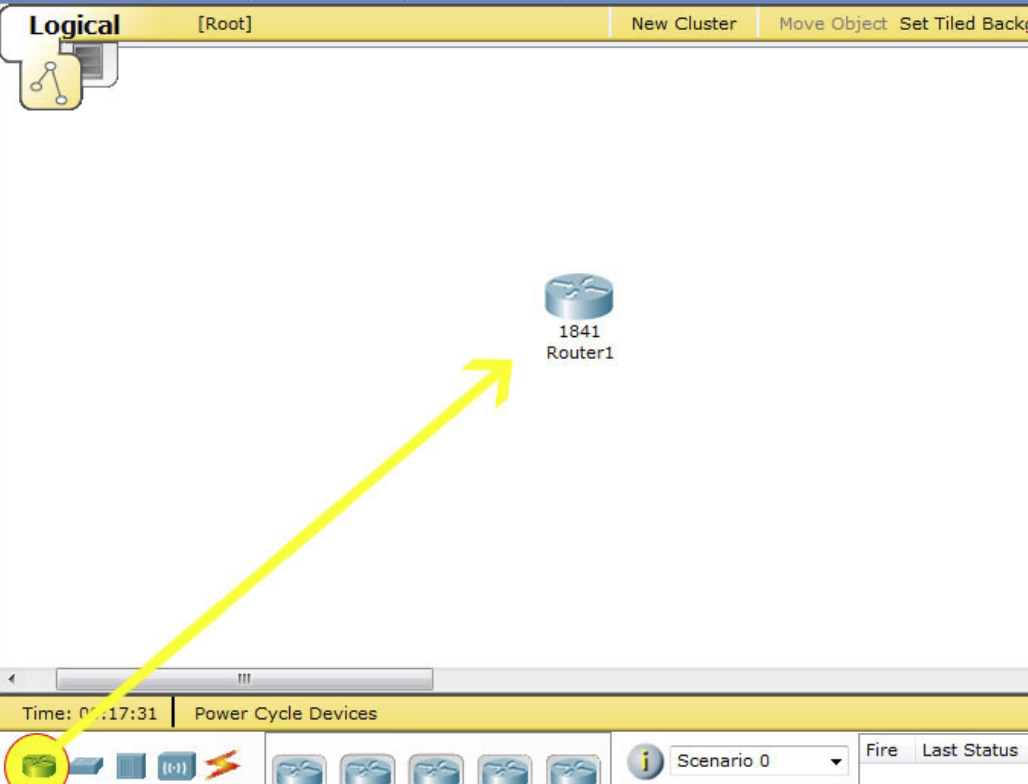
Step 4: Position the Router
Once you’ve added the router to your workspace, you can position it within your network topology:
- Click and drag the router icon to move it to the desired location on your workspace.
- Place it in a central position where it can easily connect to other network devices, such as switches, PCs, or other routers.
Step 5: Connect Network Cables
A router’s primary function is to route traffic between different network segments. To achieve this, you need to connect the router to the devices it will communicate with. In Packet Tracer, you can use various types of network cables to establish these connections:
- Select a Cable: In the lower-left corner of the Packet Tracer window, you’ll find the “Connections” panel. Click on it to access different cable types, including Ethernet cables (straight and crossover), serial cables, and fiber optic cables.
- Drag and Connect: To create a connection, click and drag the desired cable type from the “Connections” panel to one of the router’s interfaces (represented by numbered ports).
- Connect Devices: After attaching one end of the cable to the router, connect the other end to the network device you want to connect to the router. This could be a switch, a PC, or another router.
- Repeat as Needed: Depending on your network design, you may need to create multiple connections to other devices. Repeat the process for each connection, ensuring that you connect the appropriate interfaces.
Step 6: Configure the Router (Optional)
Configuring a router is a crucial step in network design, but it’s optional and beyond the scope of this basic guide. However, it’s essential to understand that routers require configuration to operate effectively in a network.
In a real-world scenario, you would configure the router with settings such as IP addresses, routing protocols, and security policies. Packet Tracer provides a simulation environment where you can practice and experiment with router configurations as needed.
Step 7: Verify Connectivity (Optional)
After adding a router and configuring it (if necessary), you may want to verify connectivity between devices in your network. This step is particularly important for troubleshooting and ensuring that data can flow between different network segments.
To verify connectivity:
- Use the “CLI” (Command Line Interface) of the router to execute commands like
pingandtracerouteto test connectivity to other devices. - Ensure that routing tables are correctly configured on the router so that it knows how to reach devices in different subnets.
- Use simulation features in Packet Tracer to observe data traffic and verify that it follows the expected path through the router.
Step 8: Save Your Project
Once you’ve added a router and configured your network to your satisfaction, it’s a good practice to save your Packet Tracer project. Saving your project allows you to revisit and continue working on it at a later time.
To save your project:
- Go to the “File” menu at the top of the Packet Tracer window.
- Select “Save” or “Save As” to specify a location and filename for your project. Choose a meaningful name that reflects your network topology.
- Click “Save” to save your project.
Conclusion for adding a Router in Packet Tracer
Adding a router in Packet Tracer is a fundamental step in creating complex and functional network designs. Routers play a pivotal role in routing data between different network segments, enabling seamless communication within your network. By following the step-by-step guide outlined above, you can easily integrate routers into your Packet Tracer projects, allowing you to design, configure, and test networks in a virtual environment. Whether you’re a student learning about networking or a network professional experimenting with network configurations, Packet Tracer’s capabilities provide an excellent platform for honing your networking skills.


