
Contents of this article
In this article, I describe the process of Configuring a PC in Packet Tracer. Configuring a PC in Packet Tracer involves setting up various parameters to enable it to communicate on a network. This includes configuring its IP address, subnet mask, default gateway, and DNS settings. In this comprehensive guide, we’ll walk through the process of configuring a PC in Packet Tracer, ensuring it is ready to communicate on a network.
Understanding PC Configuration
Before we dive into the configuration steps, it’s essential to understand the key parameters and concepts involved in configuring a PC:
- IP Address: An IP address is a unique identifier for a device on a network. It allows devices to send and receive data within a network. IP addresses are typically assigned dynamically by a DHCP server or configured statically.
- Subnet Mask: The subnet mask determines which portion of an IP address is the network identifier and which part is the host identifier. It’s used to divide an IP address into network and host portions.
- Default Gateway: The default gateway is the IP address of the router or layer 3 switch that connects the local network to other networks or the internet. It allows devices to communicate beyond their local subnet.
- DNS (Domain Name System): DNS servers translate human-readable domain names (like www.example.com) into IP addresses that computers can understand. Configuring DNS servers enables the PC to resolve domain names to IP addresses.
Now, let’s proceed with configuring a PC in Packet Tracer:
Step 1: Launch Packet Tracer and Create a Network
- Launch Packet Tracer: Open the Packet Tracer application on your computer.
- Create a Network Topology: If you haven’t already, create a network topology in Packet Tracer. This may include routers, switches, and PCs. Ensure that the PC you want to configure is part of the topology.
Step 2: Access the PC’s Desktop
- Select the PC: In Packet Tracer, click on the PC you want to configure to select it. You should see the PC’s properties and options in the lower-left corner of the window.
- Access Desktop Tab: Click on the “Desktop” tab in the PC’s properties to access its desktop view.
Step 3: Open the Network Settings
- Access Network Settings: On the PC’s desktop, locate and open the “Network Settings” or “Network and Sharing Center” (the exact label may vary depending on the Packet Tracer version).
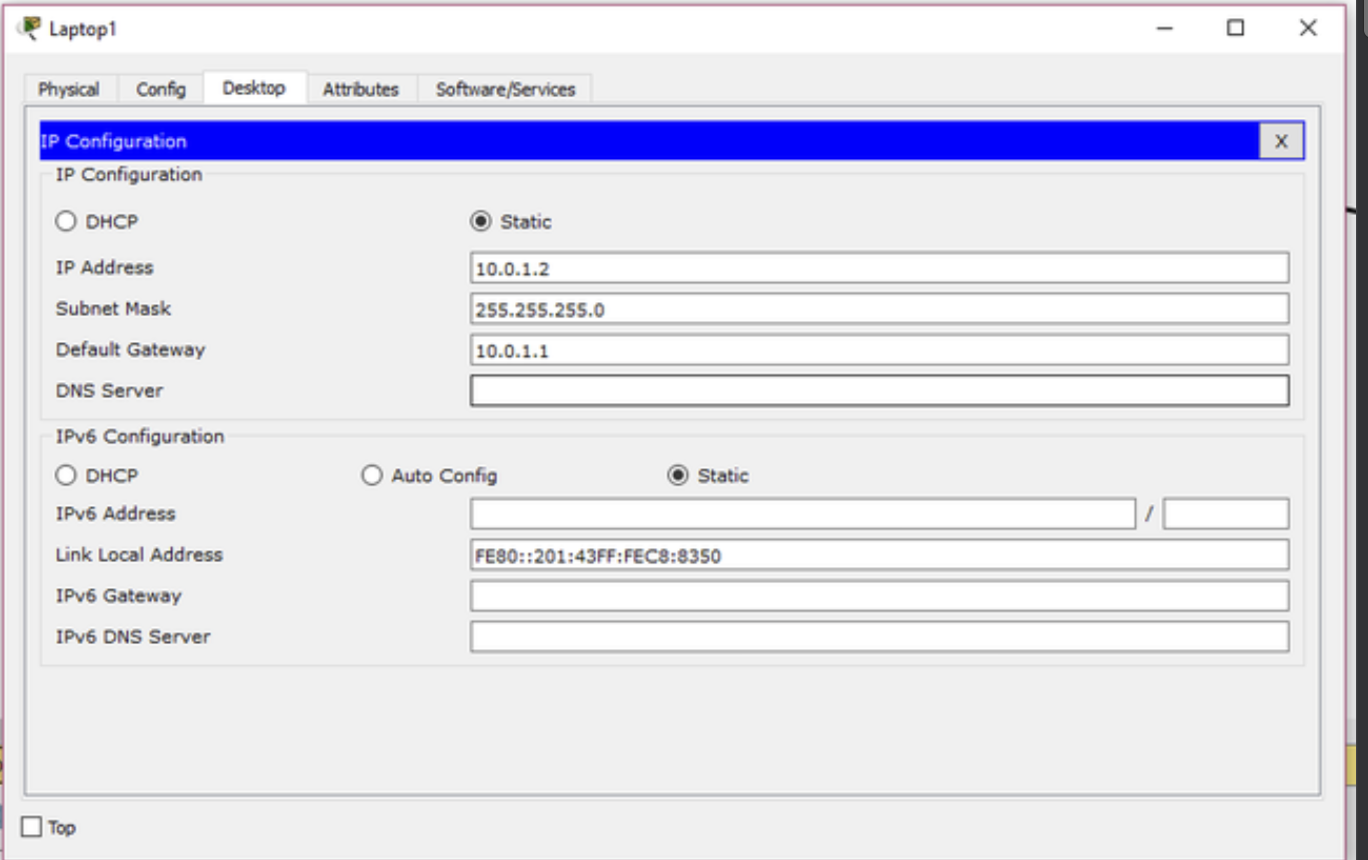
Step 4: Configure IP Address
- Access IP Configuration: In the Network Settings or Network and Sharing Center window, look for the option to configure the PC’s IP address. It may be labeled as “Change adapter settings” or “Change TCP/IP settings.”
- Select Ethernet Adapter: In the IP configuration window, you should see the network adapters of the PC. Select the “Ethernet” or “Local Area Connection” adapter.
- Configure IP Address: Click on the “Properties” or “Edit” button to configure the IP address settings.
- Choose IP Configuration Type: In the Ethernet Properties or TCP/IP Properties window, you’ll have two options for IP configuration:
- Static (Manual) Configuration: This option allows you to set a specific IP address, subnet mask, default gateway, and DNS servers manually.
- Dynamic (DHCP) Configuration: If your network uses DHCP (Dynamic Host Configuration Protocol), you can select this option to obtain an IP address and other settings automatically from a DHCP server. For the purpose of this guide, we’ll configure a static IP address. Select the “Use the following IP address” option.
- Enter IP Address: Enter the desired IP address for the PC. Ensure that the IP address is within the same subnet as the rest of the devices in your network. For example:
- IP Address: 192.168.1.10 (This is just an example; use an available IP address in your network.)
- Subnet Mask: 255.255.255.0 (This is a common subnet mask for small networks.)
- Enter Default Gateway: Specify the default gateway, which is the IP address of the router or layer 3 switch that connects the PC to other networks or the internet. For example:
- Default Gateway: 192.168.1.1 (Use the actual IP address of your router.)
- Configure DNS Servers: If you have DNS servers on your network or want to use public DNS servers (e.g., Google DNS or OpenDNS), you can enter their IP addresses in the “Preferred DNS server” and “Alternate DNS server” fields. For example:
- Preferred DNS Server: 8.8.8.8 (Google’s public DNS server)
- Alternate DNS Server: 8.8.4.4 (Google’s public DNS server)
- Save Configuration: After entering the IP address, subnet mask, default gateway, and DNS server settings, click “OK” or “Save” to save the configuration.
Step 5: Verify Configuration
- Verify IP Configuration: To ensure that the IP address configuration is correct, you can open a command prompt on the PC and use the
ipconfigcommand to view the PC’s IP address, subnet mask, default gateway, and DNS server settings. To open a command prompt, click on the PC’s desktop and search for “cmd” or “Command Prompt.” In the command prompt window, type the following command:
ipconfigThe output will display the PC’s network configuration.
- Ping Test: You can perform a ping test to verify that the PC can communicate with other devices on the network. Use the
pingcommand followed by the IP address of another device (e.g., a router or another PC). For example:
ping 192.168.1.1If you receive successful ping responses, it indicates that the PC is able to communicate on the network.
Additional Considerations for Configuring a PC in Packet Tracer
Here are some additional considerations when configuring a PC in Packet Tracer:
- Subnet Design: Ensure that the IP address you assign to the PC is part of the correct subnet design for your network. Proper subnetting is crucial for efficient IP address allocation.
- Default Gateway: Devices on the same subnet as the PC should use the PC’s IP address as their default gateway if the PC is acting as a router or gateway.
- Security: Implement firewall rules and security policies on the PC as needed to control inbound and outbound traffic. Ensure that your PC’s security settings are in line with your network’s security policies.
- DNS Resolution: Proper DNS server configuration is essential for resolving domain names to IP addresses. Ensure that DNS servers are reachable and correctly configured.
- DHCP: If you prefer dynamic IP address assignment, ensure that a DHCP server is available on your network, and configure the PC’s Ethernet adapter to obtain an IP address automatically.
Conclusion for Configuring a PC in Packet Tracer
Configuring a PC in Packet Tracer involves setting up key parameters such as its IP address, subnet mask, default gateway, and DNS settings. This process enables the PC to communicate on a network, whether it’s a small local network or part of a larger enterprise network. Understanding how to configure these settings is essential for network administrators and engineers responsible for managing and maintaining networked devices in real-world networking environments.


